Sunday, February 13, 2022

Let’s Set Sail for PP578

Happy Sunday, friends!
Time for a fun new creative challenge over at The Paper Players
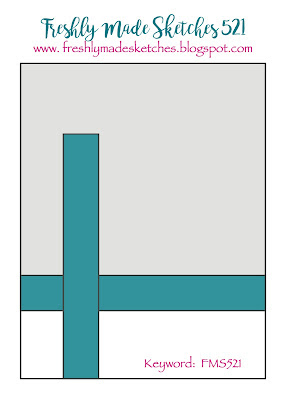
This week, LeAnne is hosting our Color Challenge.
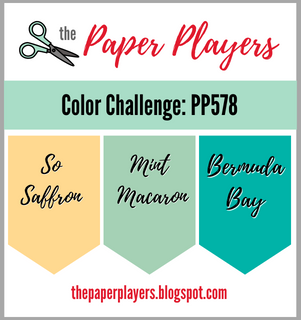
Isn’t this color trio beautiful? I couldn’t wait to use them together. I’m going to share a little secret with you about me and Color Challenges. When I sit down to create with specified colors, I pretty much always want to grab flowers. Flowers are my “safe zone”, not that there is anything wrong with that. These colors would actually create a beautiful bouquet! I just had to challenge myself not to use my "floral safety net" this week and as I was looking through my stamp sets, inspiration struck. 

*I’ve listed all of the measurements and details for my card below and there is a full supply list at the very end of this post.
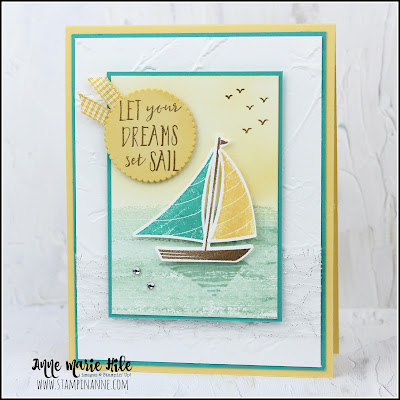
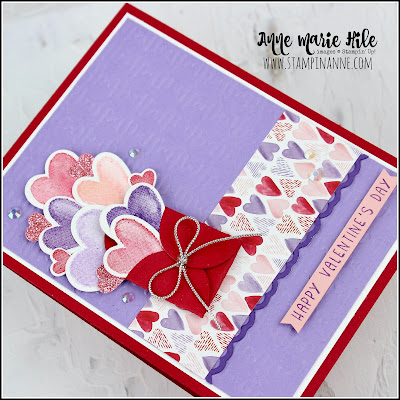
I recently ordered the Let’s Set Sail stamp set and coordinating Sailboat Builder Punch and thought it would be fun to use with this week’s color trio. I love stamped that coordinate with punches. It makes it easy peasy to cut out the stamped images, which is especially awesome if you have to cut out lots of them at a time. This set has a great mix of images and sentiments to really create some fun cards! This little scene came together pretty easily, you can get the details below. 

Overall, I wanted to keep the layout pretty simple but I also added some texture to the background using the Painted Texture 3D Embossing Folder. I thought it looked a little bit like water. I kept thinking I wanted something else in the background and then I remembered the Metallic Mesh Ribbon. This is one of those trims that I tend to overlook simply because of its size, but it really does add some awesome texture and shine with minimal bulk. In this case, it reminded me a little of a fishing net which worked with the nautical theme of the card. 
Card Measurements & Details: 
  • So Saffron Card Base: 4-1/4” x 11”, scored at 5-1/2"
  • Bermuda Bay Cardstock: 4” x 5-1/4”
  • Basic White Cardstock: 3-7/8” x 5-1/8”, emboss with Painted Texture 3D Embossing Folder  
  • Metallic Mesh Ribbon
  • Bermuda Bay Cardstock: 2-3/4” x 3-7/8”
  • Basic White Cardstock: 2-5/8” x 3-3/4”
  • Stamp the water image three times (stamped-off once for lighter ink), then add some So Saffron ink to shade the “sky” using a Blending Brush. 
  • Stamp the birds in the top right corner in Soft Suede ink and stamp the boat shadow in Mint Macaron ink (full strength).
  • So Saffron Cardstock: scrap to die cut a 2” scalloped circle from the Layering Circles Dies, stamp the sentiment in Soft Suede ink. 
  • Add some Bumblebee Gingham Ribbon to the back of the circle as an accent, trim ends at an angle.
  • Basic White Cardstock: scrap to stamp sailboat in Soft Suede ink, one sail in So Saffron ink and the other sail in Bermuda Bay ink, then punch out using the Sailboat Builder Punch.
  • Accent the boat shadow and some areas on the water with Wink of Stella for added sparkle.
  • Rhinestones Basic Jewels
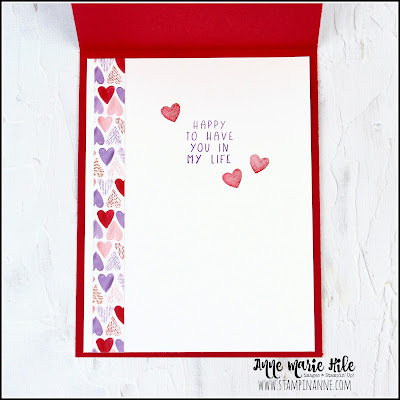
  • Basic White Cardstock (inside card): 4” x 5-1/4”, add the water image in Mint Macaron ink, stamped-off once and add the sentiment and the birds in Soft Suede ink. 
Finally, here is look inside the card. I simply added a fun sentiment and coordinating images from the stamp set. This card is perfect to celebrate a birthday or maybe even the start of a new endeavor. I really like how it came together and I hope you do as well! :) 

I hope you will join us this week over at The Paper Players and share your project for our          Color ChallengeWe’d love to see what you come up with! You can link up your project through Noon PST on Friday February 18th, 2022

Be sure to stop by and say hello to The Paper Players Design Team: 
 
Anne Marie Hile (that’s me!) 

Thanks for visiting today! All of the products that I used on this card are listed below. You c
an click on any of the photos to go directly to my 
Stampin’ Up!® online store. 

The current Host Code is: 3M672Q3H

Also, If you place an order over $50 (before tax and shipping) using the above host code, you will also receive a gift from me: a FREE Exclusive Project Tutorial PDFsee the sneak peek below. Each month, I partner with an amazingly talented group of demonstrators from around the world to create these project tutorials. This month's tutorial features 13 awesome project ideas to inspire your creativity! 

If your order is over $150, please do NOT use the host code. 
You will still receive the PDF tutorial along with an additional free gift from me.

Also, Sale-A-Bration is going on right now through February 28, 2022
That means for every $50 you spend, you will also earn FREE product from Stampin’ Up!® 
You can learn more about Sale-A-Braton HERE

Thanks for stopping by.
Have a HAPPY day!

Big hugs, 
Anne Marie

Product List

Sunday, February 6, 2022

Sweet Conversations for PP577

Happy Sunday, friends!
Time for a fun new creative challenge over at The Paper Players
This week, Laurie is hosting our Theme Challenge.
This challenge is so perfectly timed because I still need to make a few more cards for Valentine’s Day and I was cutting it close to get them in the mail on time. Cards for this theme don’t have to just be for Valentine’s Day though. Any occasion celebrating love and/or friendship will work! Hope you will join us with your project this week! 

*I’ve listed all of the measurements and details for my card below and there is a full supply list at the very end of this post.
Color Combo:
For my card, I used the Sweet Conversations stamp set and coordinating Sweet Talk Dies from the Stampin’ Up!® January - June Mini Catalog. There is the cutest little die cut envelope in this set and I thought it would be fun to have a big bunch of hearts bursting out of it. I always say a handmade card is like a "hug in an envelope”, so all of these cute hearts couldn’t be more perfect. What do you think?  


I also used the Sweet Talk Designer Series Paper and added some texture with the Gingham Embossing Folder. All of the products in this suite coordinate so beautifully together, which is always a win, in my book.  
One of the dies in the Sweet Hearts Dies is a trio of hearts connected together. This die coordinates with a stamped image and cuts out the itty-bitty hearts that I cut to fill the die cut envelope. It ALSO cuts the outlines of three hearts connected together. I used three sets of those heart outlines for the little “border” under the DSP. I started by adding one die cut to the middle on the back of the DSP so only the tops of the hearts peeked through. Then I added two more of the same die cut images on either side and trimmed off the excess to keep it even. I thought they added a pop of detail and were another fun way to use the dies to create a unique border beyond the theme of the set! 
As many of you might know, I LOVE a good sketch challenge! Sketches are such awesome inspiration for card layouts, especially when your creative mojo needs a little help getting going. I was really inspired by Linda’s awesome sketch this week over at Freshly Made Sketches. There are so many possibilities with this sketch, I can’t wait to use it again! 
Card Measurements & Details: 
  • Real Red Card Base: 4-1/4” x 11”, scored at 5-1/2"
  • Basic White Cardstock: 4” x 5-1/4”
  • Highland Heather Cardstock: 3-7/8” x 5-1/8”, emboss with Gingham Embossing Folder  
  • Sweet Hearts DSP: 3-7/8" x 1-1/4” 
  • Gorgeous Grape Cardstock: scrap to die cut three of the “heart trio” images using the Sweet Hearts Dies (this will create the border popping out behind the DSP)
  • Real Red Cardstock: die cut a small envelope from using the Sweet Hearts Dies
  • Supple Shimmer Specialty Paper (pink): die cut three small hearts using the Sweet Hearts Dies
  • Basic White Cardstock: scrap to stamp three tiny hearts in Real Red ink, two small hearts in Real Red & Gorgeous Grape ink, three medium hearts in Real Red, Blushing Bride & Gorgeous Grape ink and one large heart in Highland Heather ink
  • Die cut the heart images using the Sweet Hearts Dies
  • Blushing Bride Cardstock: 2-7/8” x 1/4”, stamp sentiment in Gorgeous Grape ink and banner punch on either side using the Tailored Tag Punch
  • Iridescent Rhinestones Basic Jewels & Simply Elegant Trim (silver)
  • Basic White Cardstock (inside card): 4” x 5-1/4”, stamp the sentiment in Gorgeous Grape ink and three small hearts in Real Red ink
  • Sweet Hearts DSP (inside card): 1/2” x 5-1/4
Finally, here is look inside the card. I simply added a little pop of the DSP featured on the front of the card to bring all of the colors inside the card. Then I stamped a coordinating sentiment along with a trio of hearts. Easy peasy and ready to pop in this mail this week for Valentine’s Day! 

I hope you will join us this week over at The Paper Players and share your project for our          ”Love & Friendship” Theme ChallengeWe’d love to see what you come up with! You can link up your project through Noon PST on Friday February 11th, 2022

Be sure to stop by and say hello to The Paper Players Design Team: 
 
Anne Marie Hile (that’s me!) 

Thanks for visiting today! All of the products that I used on this card are listed below. You c
an click on any of the photos to go directly to my 
Stampin’ Up!® online store. 

The current Host Code is: 3M672Q3H

Also, If you place an order over $50 (before tax and shipping) using the above host code, you will also receive a gift from me: a FREE Exclusive Project Tutorial PDFsee the sneak peek below. Each month, I partner with an amazingly talented group of demonstrators from around the world to create these project tutorials. This month's tutorial features 13 awesome project ideas to inspire your creativity! 

If your order is over $150, please do NOT use the host code. 
You will still receive the PDF tutorial along with an additional free gift from me.

Also, Sale-A-Bration is going on right now through February 28, 2022
That means for every $50 you spend, you will also earn FREE product from Stampin’ Up!® 
You can learn more about Sale-A-Braton HERE

Thanks for stopping by.
Have a HAPPY day!

Big hugs, 
Anne Marie

Product List