
Showing posts with label masking. Show all posts

Monday, November 28, 2022

Taco Fiesta - Spicy Peppers

Hi friends! Happy Monday to you. I hope your week is off to a great start. Today, I have another card to share with you using a sneak peek of the new Taco Fiesta stamp set from the upcoming Stampin’ Up!® January - April Mini Catalog, which will debut on January 5th, 2023. 

This stamp set is SO much fun and was designed by my friend (and team leader) Erica Cerwin. I shared another adorable card here on my blog yesterday. If you missed it, you can check it out HERE
Color Combo:
On yesterday’s card I used the itty bitty chili pepper image which got me to thinking of other ways to pair up the large and small peppers on a card. Then it hit me, why not take that bowl full of guacamole and turn it into a bowl full of chili peppers

Layering up the peppers was easy to do by using Stampin’ Up!® Masking Paper. If you’ve never used masking before, it is a great tool to have in your stamp room. Not only can you mask images for stamp layering or shading, but you can create your own stencils, too. One side is smooth paper and the other has a light adhesive (kind of like a post-it note) which will hold the paper in place on your projects but can be easily removed without damaging the paper underneath. In this case, I was able to use the masking paper to layer up my images easily without the peppers overlapping.  I also think this would be fun to do to make a little bowl of tortilla chips…that’s on my list to try next. :) 
I started by stamping the bowl of guacamole in Momento ink on a scrap of Basic White Cardstock. I fussy cut the bowl and trimmed off the guac. That is probably the first time in my life I’ve ever discarded perfect good guacamole, by the way. Haha! Then on a small piece of Masking Paper, I stamped two small chili peppers and fussy cut them out. I also made sure to peel the backing off so they were ready to stick down when I started stamping. 
Next, I started stamping the peppers on Basic White Cardstock to fill the little bowl. I started stamping the bottom two peppers in the middle, then covered those stamped images with the Masking Paper and stamped one pepper on the left and one on the right. Then I just moved the masking paper (tweezers make it easy) to position over the stamped images to keep layering the stamps until my bowl was chock full of chili’s! 
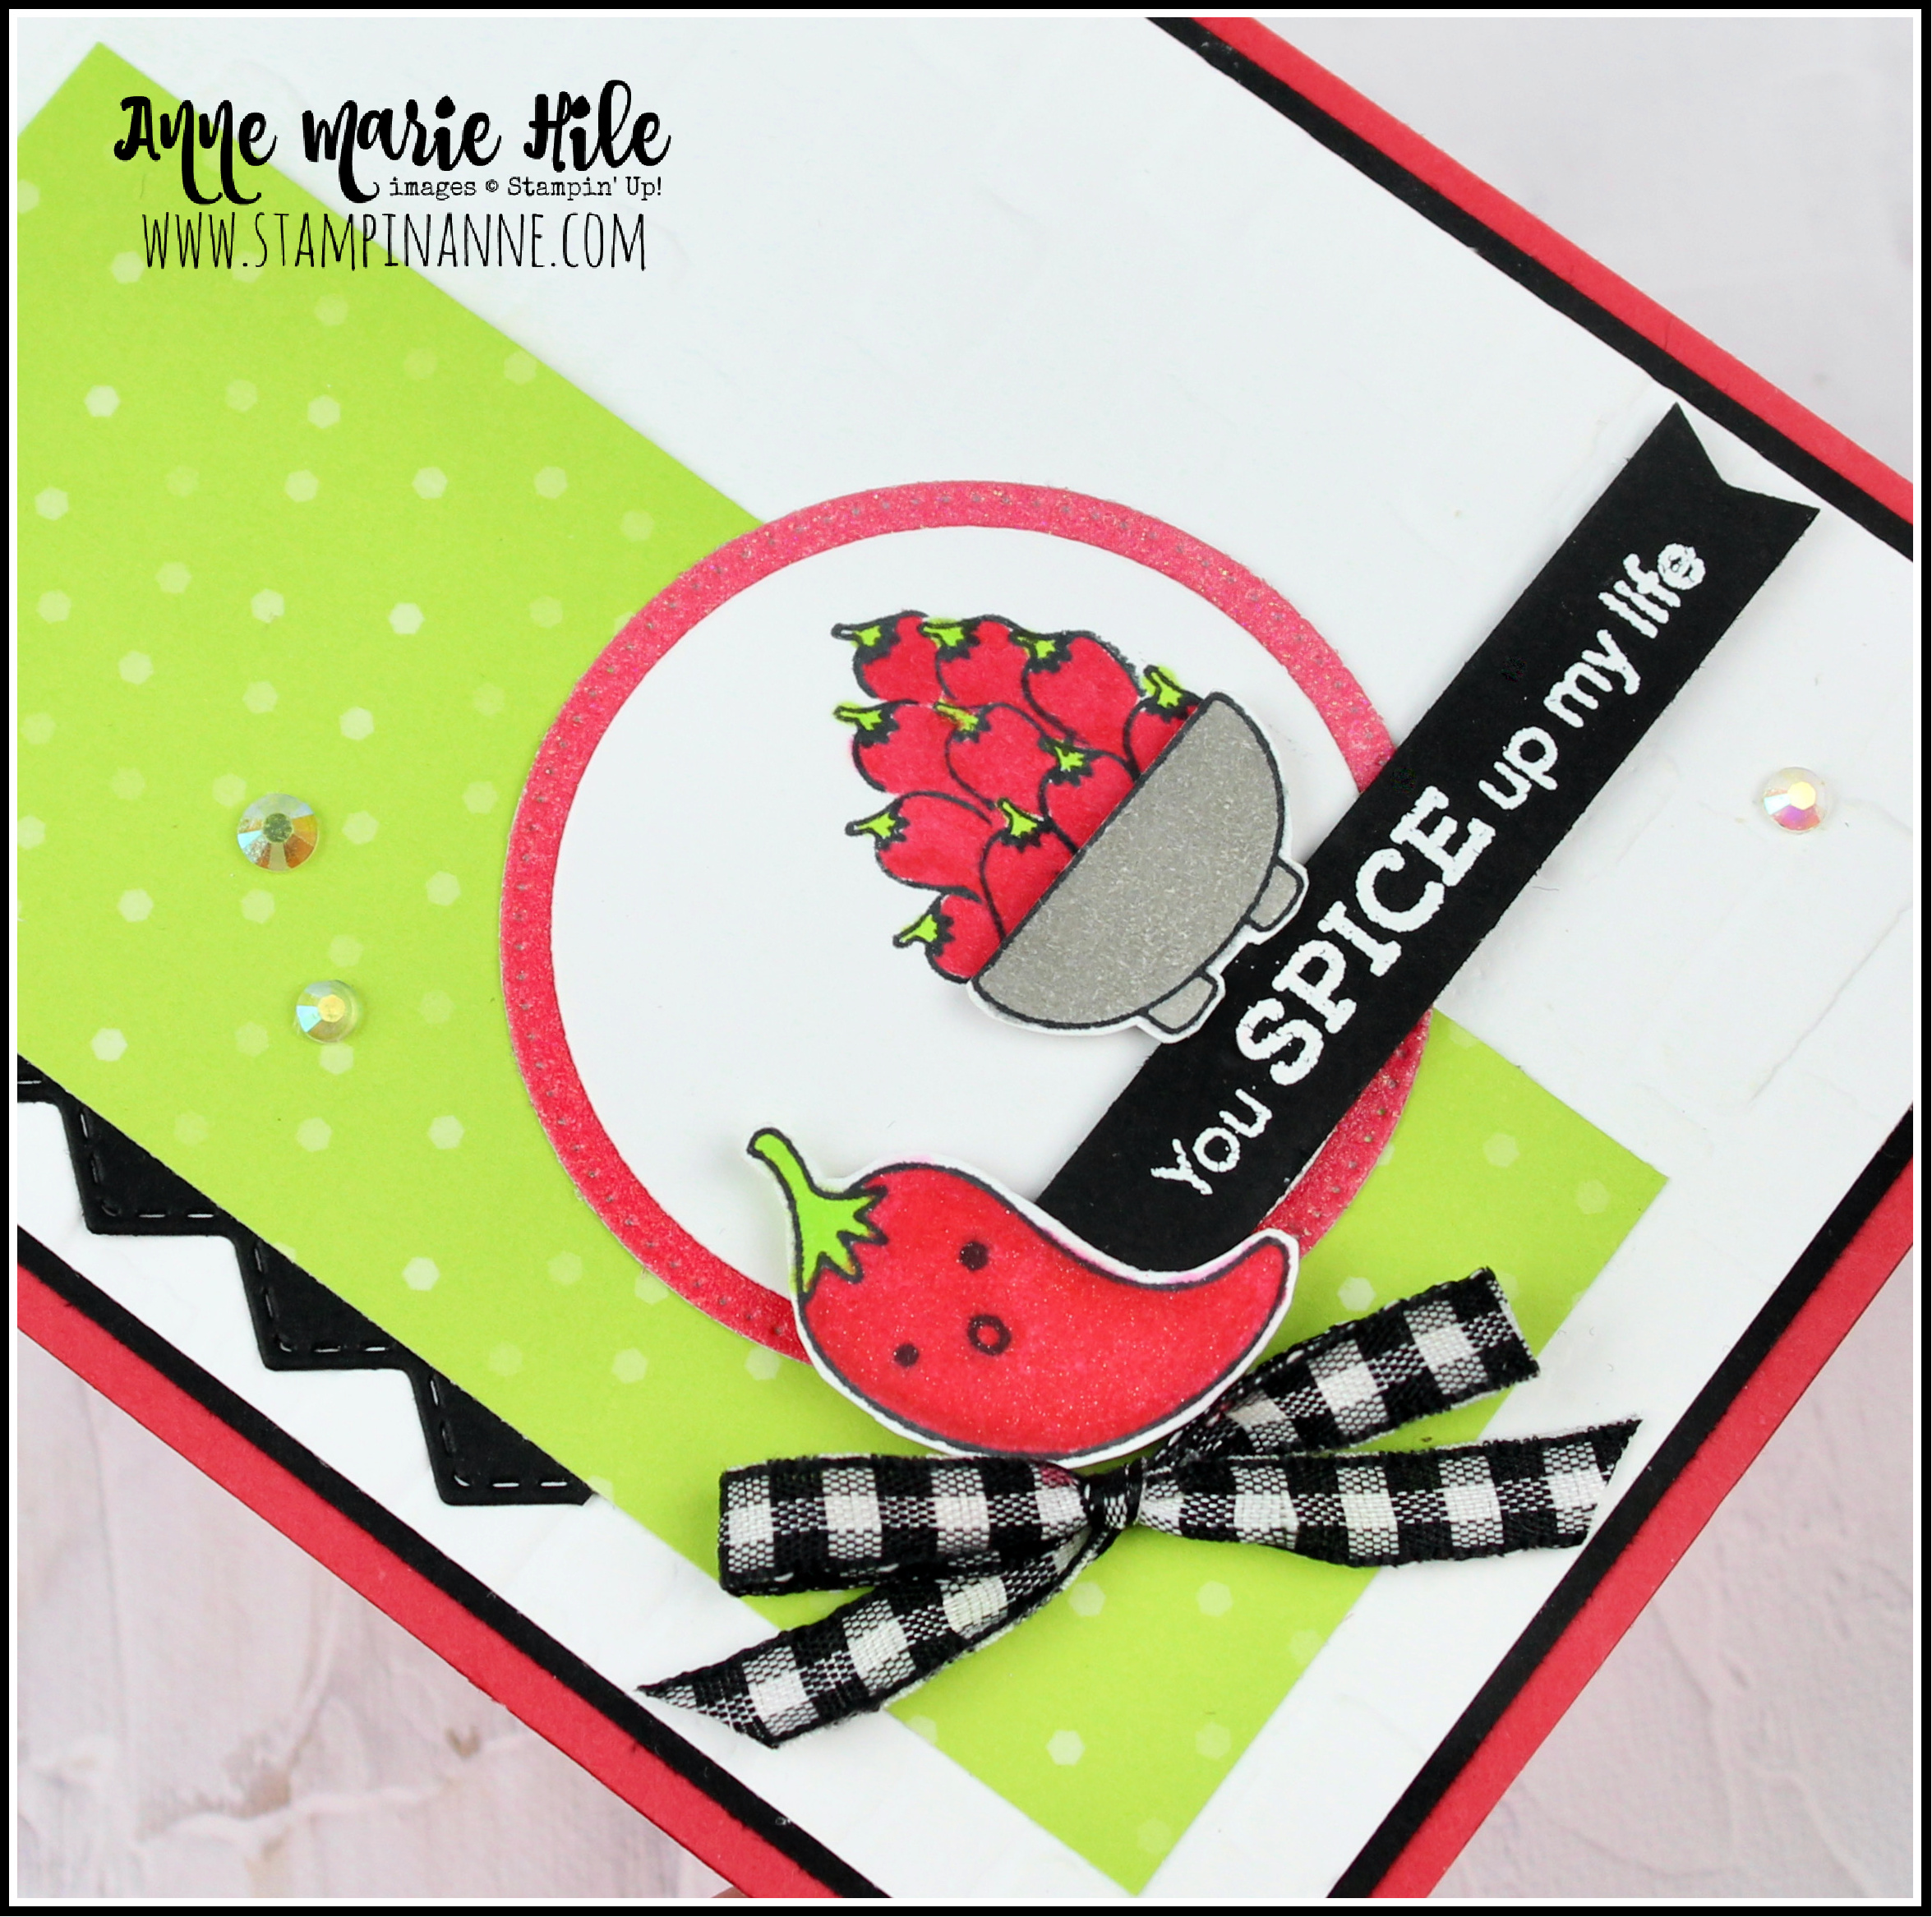
Card Measurements & Details: 
  • Sweet Sorbet Card Base: 4-1/4” x 11”, scored at 5-1/2”
  • Basic Black Cardstock: 4” x 5-1/4" 
  • Basic White Cardstock:3-7/8” x 5-1/8", emboss with Brick & Mortar 3D Embossing Folder
  • Basic Black Cardstock: small scrap to die cut the trim for the Basic Borders Dies
  • Parakeet Party DSP (from 2022-2024 In Colors Designer Series Paper Pack): 2” x 4-1/2”
  • Sweet Sorbet Glimmer Paper (from 2022-2024 In Colors Glimmer Paper Pack): die cut the third largest circle from the Stylish Shapes Dies
  • Basic White Cardstock: die cut the 1-7/8" circle from the Layering Circles Dies and stamp the chili peppers to “fill” the bowl
  • Basic White Cardstock: scrap to stamp larger chili pepper and bowl of guacamole, color and fussy cut
  • Basic Black Cardstock: 2-3/4” x 3/8" stamp sentiment in Versamark ink and heat emboss with white embossing powder. Trim a banner (or use Banners Pick a Punch) on right side. 
  • Basic White Cardstock (card interior): 4” x 5-1/4”
  • Parakeet Party DSP (card interior): 4” x 1/2” 
Finally, here is a peek inside the card! I simply added a little strip of DSP and stamped a few more peppers to keep the spicy party going from the front of the card. There is plenty of room for a handwritten note, too. I’m going to give this one to my husband, just because. 

Thanks for visiting today! All of the products that I used on this card are listed below. You c
an click on any of the photos to go directly to my 
Stampin’ Up!® online store. 

The current Host Code is: 
UBDCK43Z

Place an order over $50 (before tax and shipping) using the above host code, you will also receive a gift from me: a FREE Exclusive Project Tutorial PDFsee the sneak peek below. Each month, I partner with an amazingly talented group of demonstrators from around the world to create these project tutorials. This month's tutorial features 13 awesome project ideas to inspire your creativity! 
If your order is over $150, please do NOT use the host code. 
You will still receive the PDF tutorial along with an additional free gift from me.

Thanks for stopping by.
Have a HAPPY day!

BIG hugs, 
Anne Marie

Please Note: The Taco Fiesta stamp set will be available to order starting January 5th, 2023.

Product List

Sunday, June 19, 2022

A Fish & A Wish for PP596

Happy Sunday, friends!
Time for a fun new creative challenge over at The Paper Players
This week, the lovely Jaydee is hosting our Clean-and-Simple (CAS) Challenge
Out of all of the challenges so far this year, this was the one that scared me the most. If you have visited me before, you know that Clean and Simple (CAS) cards are always a struggle for me, but a One Layer Card…now that’s definitely out of my element! I took a few deep breaths, chugged some iced tea to muster the energy and got busy. I wasn’t going to let this challenge defeat me. Haha! I really hope you will join us and play along this week, too. 

*I’ve listed all of the measurements and details for my card below and there is a full supply list at the very end of this post.
I had the A Fish & A Wish stamp set on my desk from my Facebook Live video on Friday and it seemed like a good fit for this challenge. PS: if you want to watch the replay of my Facebook Live for another idea with this stamp set, you can CLICK HERE to watch the replay!

Let me tell you, for a One Layer Card, this certainly took a LONG time to create. Not to mention four, yes FOUR attempts to get the layout the way I wanted it. But I persevered and created this sweet seaside scene on a single layer. This card uses a couple different masking techniques to create the look of a layered scene on a single layer. It also uses the new Masking Paper, which is AMAZING! I’ll break down the details below. 
Card Measurements & Details: 
  • Thick Basic White Card Base: 4-1/4” x 11", scored at 5-1/2”
  • Use the largest frame in the Stitched With Whimsy Dies to die cut the stitched frame on the card front. 
  • Mask off the inside of the frame with some scrap paper and washi tape (to hold the paper down securely) to create an area to stamp the scene (this almost creates a “faux layer” inside the stitched frame)
  • Stamp the greenery in Soft Sea Foam ink along the bottom of the masked-off frame
  • Lightly dab some Sahara Sand ink along the bottom gently with a Sponge Dauber
  • Ink up the smaller fish in Petal Pink ink, then dab Calypso Coral ink around the edges with a Sponge Dauber before stamping on the card
  • Repeat again for the second smaller fish and do the same to stamp the larger fish
  • Stamp two small and one large fish on a piece of Masking Paper (NEW!), fussy cut around the images, then peel off the backing and stick the fussy-cut fish directly over the stamped fish on the card to cover them up
  • Add Pool Party ink with a Blending Brush to the card front to create the “watery” background
  • Remove the Masking Paper from the fish…the color really POPS! 
  • Stamp the sentiment in Balmy Blue ink in the top left corner
  • Add Wink of Stella to the fish and along the sandy bottom for added sparkle
  • Add three Rhinestone Basic Jewels to accent the greenery as shown 
Finally, here is a peek inside the card! I did add a 4” x 5-1/4” layer inside (shhh, I don’t think it technically counts) with the same elements from the front, to keep the seaside party going. I stamped one little fish, some greenery and sponged a little Sahara Sand along the bottom edge for that “sandy” vibe. There’s plenty of room to write a handwritten thank you note to the recipient. 

I hope you will join us this week over at The Paper Players and share your project for our fun         ”One Layer” Clean-and-Simple (CAS) ChallengeWe’d love to see what you come up with! You can link up your project through Noon PST on Friday June 24th, 2022

Be sure to stop by and say hello to The Paper Players Design Team: 
 
Anne Marie Hile (that’s me!) 

Thanks for visiting today! All of the products that I used on this card are listed below. You c
an click on any of the photos to go directly to my 
Stampin’ Up!® online store. 

The current Host Code is: 
Z7CE4MNW


Just announced! For one day ONLY, Tuesday June 21st, Stampin’ Up!® is offering FREE shipping on orders of $75 or more! This is a great way to get more bang for your buck on your stamping supplies, so don’t miss out. 

Also, If you place an order over $50 (before tax and shipping) using the above host code, you will also receive a gift from me: a FREE Exclusive Project Tutorial PDFsee the sneak peek below. Each month, I partner with an amazingly talented group of demonstrators from around the world to create these project tutorials. This month's tutorial features 11 awesome project ideas to inspire your creativity! 

If your order is over $150, please do NOT use the host code. 
You will still receive the PDF tutorial along with an additional free gift from me.

Thanks for stopping by.
Have a HAPPY day!

Big hugs, 
Anne Marie


Product List