

Happy Sunday, friends!
Time for a fun new creative challenge over at The Paper Players!
This week, I am thrilled to be hosting our Sketch Challenge.

I’ve said it before and I’ll say it again, sketch challenges are my favorite! I had fun designing this layout and I hope you like it as well. The focal image can be any shape or element you desire, so have some fun with it. We’d love to see what you make with it!
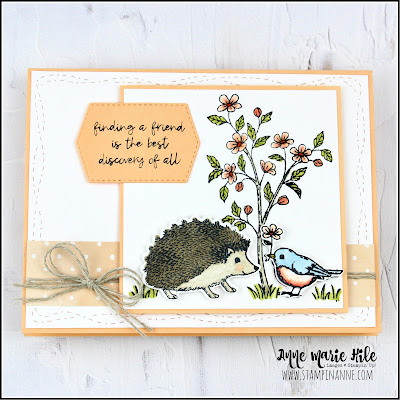
For my card, I decided to use the Flowering Tulips stamp set and coordinating Tulips Dies from the Stampin’ Up!® January-June Mini Catalog. This is such a fun bundle and the dies create the most beautiful tulip bouquets! I will admit, it did take just a little bit to figure out how the pieces fit together, but after that the card came together easily. I also added a few Mini Stampin’ Dimensionals between the layers inside the tulips, so the flowers really pop off the card.
*I’ve listed all of the measurements and details for my card below and there is a full supply list at the very end of this post.

The Flowering Fields Designer Series Paper is absolutely gorgeous and I just love this pattern with the mix of purples and greens. My grandmother had tulips in her garden and my favorite were always the deep purple tulips because they always stood out amidst the other bright colors.
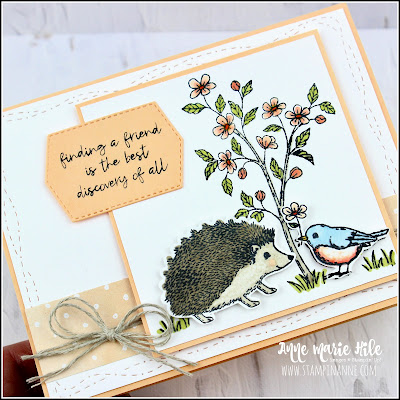
The Fresh Freesia Shimmer Vellum is a little tough to see in the photos but really adds a gorgeous pop of sparkle on the card. I die cut the circle in Shimmer Vellum and there is also a die cut layer inside the tulips, too. It’s so pretty! I also added a little bit of Rich Razzleberry ink lightly with a Sponge Dauber to the Fresh Freesia layer inside the tulips. It really helped to give them a little more depth. I embellished the card with a trio of Brushed Brass Butterflies and some Gold Shimmer Ribbon.

Card Measurements & Details:
- Shaded Spruce Card Base: 4-1/4” x 11”, scored at 5-1/2"
- Rich Razzleberry Cardstock: 4” x 5-1/4”
- Flowering Fields Designer Series Paper: 3-7/8” x 5-1/8”
- Shaded Spruce Cardstock: 3-7/8” x 2”, emboss with polka dot folder from the Checks & Dots Embossing Folders
- Fresh Freesia Shimmer Vellum: die cut a 2-5/8” circle from the Layering Circles Dies (#151770 - I forgot to add them to the product list at the end of the post)
- Rich Razzleberry, Fresh Freesia, Shaded Spruce Cardstock & Fresh Freesia Shimmer Vellum: scraps to die cut the pieces to assemble the layered tulips
- Basic White Cardstock: 2-3/4” x 7/8”, stamp sentiment in Rich Razzleberry ink
- Brushed Brass Butterflies & Gold Shimmer Ribbon
- Basic White Cardstock (inside card): 4” x 5-1/4”, stamp sentiment in Rich Razzleberry ink
- Flowering Fields Designer Series Paper (inside card): 5/8” x 5-1/4”

Finally, here is look inside the card. I added a little strip of that beautiful DSP and a sweet birthday sentiment. The sentiment is from the Garden Birdhouses stamp set which is featured in the Stampin’ Up!® Annual Catalog.
I hope you will join us this week over at The Paper Players and share your project for our Sketch Challenge. We’d love to see what you come up with! You can link up your project through Noon PST on Friday March 4th, 2022.
Be sure to stop by and say hello to The Paper Players Design Team:
Anne Marie Hile (that’s me!)
Thanks for visiting today! All of the products that I used on this card are listed below. You c
The current Host Code is: 3M672Q3H
Also, If you place an order over $50 (before tax and shipping) using the above host code, you will also receive a gift from me: a FREE Exclusive Project Tutorial PDF, see the sneak peek below. Each month, I partner with an amazingly talented group of demonstrators from around the world to create these project tutorials. This month's tutorial features 13 awesome project ideas to inspire your creativity!

If your order is over $150, please do NOT use the host code.
You will still receive the PDF tutorial along with an additional free gift from me.

Also, Sale-A-Bration is going on right now through February 28, 2022.
Time is running out, just TWO days left!
That means for every $50 you spend, you will also earn FREE product from Stampin’ Up!®
Thanks for stopping by.
Have a HAPPY day!
Big hugs,
Anne Marie
")
")


 Designer Series Paper")


 Shimmer Ribbon")


")


 Designer Series Paper")


