

Happy Sunday, friends!
Time for a fun new creative challenge over at The Paper Players!
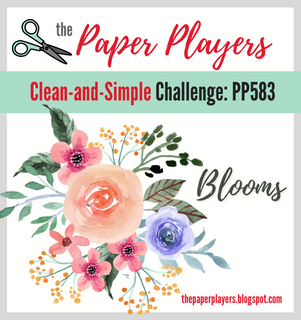
This week, the always lovely LeAnne is hosting our Sketch Challenge.

Oh, Sketch Challenge week is always my favorite and LeAnne’s sketch does not disappoint! As soon as I saw the sketch, I knew it would be great to showcase Designer Series Papers. Although I think a simple card without pattern would work well with this sketch too. I’m just on a mission to use more DSP this year, so I had a bit of “tunnel vision”. Haha! There are a lot of possibilities with this sketch and I will definitely be filing it in with my favorites. :)
*I’ve listed all of the measurements and details for my card below and there is a full supply list at the very end of this post.

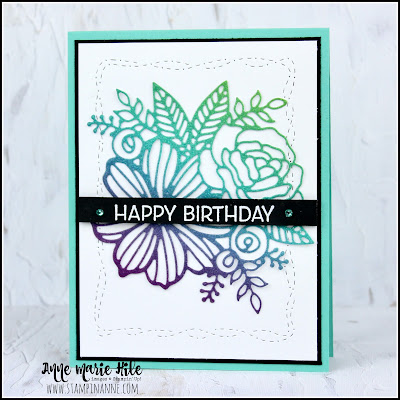
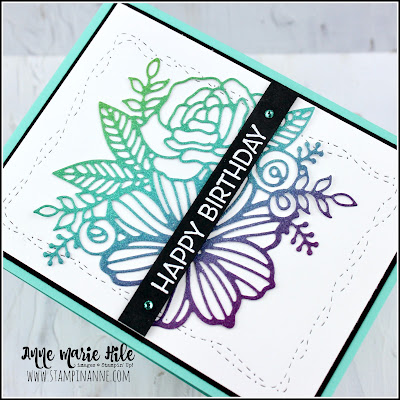
I just love the bold images in the Artfully Layered stamp set and Tropical Layers Dies! The coordinating Artfully Composed Designer Series Paper coordinates beautifully too. I decided to showcase one of the patterns on the three focal layers of the card and accent with a couple of the die cut leaves.
I also layered in a piece of the Vellum Layering Designs paper between the Old Olive layer and the DSP. I haven’t used this vellum yet and I have no idea why! It adds such a fun subtle pattern and the vellum compliments the color layered behind it perfectly. The key when adding vellum to a card is to only use adhesive in the areas that do not show through to the front of the card.

Card Measurements & Details:
- Evening Evergreen Card Base: 5-1/2” x 8-1/2”, scored at 4-1/4” ”
- Old Olive Cardstock: 5-1/4” x 4"
- Velum Layering Designs Paper: 5-1/8” x 3-7/8”
- Artfully Composed Designer Series Paper: Start with a piece that is 4-1/2” x 3-1/2” , then cut into three 1-1/2” x 3-1/2” strips. Layer the strips with about 1/8” between them on the vellum.
- Gold & Rose Gold Metallic Specialty Paper: 2-1/2” x 3-1/4”, for die cut leaves
- Bumblebee Cardstock: 2-1/2” x 3-1/4” for die cut leaves
- Evening Evergreen Cardstock: 3-3/4” x 3/4”, stamp sentiment in Versamark ink, heat emboss using White Embossing Powder and punch both ends with Banners Pick A Punch
- Linen Thread and In Color (Evening Evergreen) Jewels
- Basic White Cardstock (inside card): 5-1/4” x 4”, stamp sentiment in Evening Evergreen ink
- Artfully Composed Designer Series Paper (inside card): 1/2” x 4”

Here is a peek inside the card. I simply added another strip of Designer Series Paper and a stamped a coordinating sentiment. You can never have too many birthday cards ready to mail out, right?

I decided to make a second card using a slightly different color combo using a different pattern of the beautiful Artfully Composed Designer Series Paper. For this card, I used the same measurements as the first but spread out the DSP layers a bit more, leaving about a 1/4” border around the vellum layer and between the DSP pieces.
Color Combo:

For this card, I used some of the Evening Evergreen Shimmer Vellum for one of the die cut leaves. For the other leaves, I die cut them in Basic White Cardstock, then heat embossed them in White Embossing Powder for added shine. It’s tough to see in the photo, but it’s a really nice detail, in person.
I hope you will join us this week over at The Paper Players and share your project for our fab SketchChallenge. We’d love to see what you come up with! You can link up your project through Noon PST on Friday April 1st, 2022.
Be sure to stop by and say hello to The Paper Players Design Team:
Anne Marie Hile (that’s me!)
Thanks for visiting today! All of the products that I used on this card are listed below. You c
The current Host Code is: ETSD432J
Also, If you place an order over $50 (before tax and shipping) using the above host code, you will also receive a gift from me: a FREE Exclusive Project Tutorial PDF, see the sneak peek below. Each month, I partner with an amazingly talented group of demonstrators from around the world to create these project tutorials. This month's tutorial features 13 awesome project ideas to inspire your creativity!

If your order is over $150, please do NOT use the host code.
You will still receive the PDF tutorial along with an additional free gift from me.
The new Stampin’ Up!® Annual Catalog will be here starting May 3rd!
Be sure to check out the retiring products, some up to 50% off.
Thanks for stopping by.
Have a HAPPY day!
Big hugs,
Anne Marie
")
")


 Layering Designs")
 Designer Series Paper")
 Metallic Specialty Paper")


")


")


