
Showing posts with label fussy cutting. Show all posts

Sunday, March 13, 2022

Boughs & Blossoms for PP582

Happy Sunday, friends!
Time for a fun new creative challenge over at The Paper Players
This week, the always fabulous Joanne is hosting our Color Challenge.
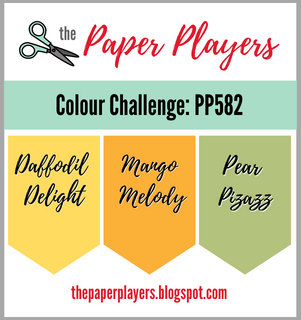
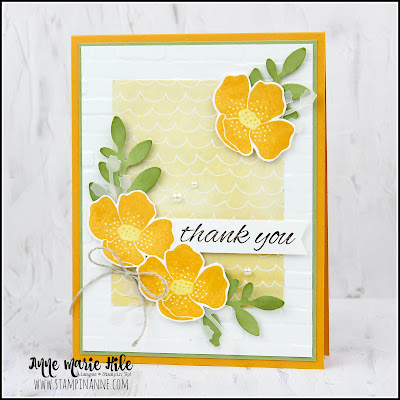
Talk about a fun color combo! So bright and cheery, it just puts me in the mood for spring. Of course, what goes perfectly with the spring season? Flowers! For my card, I decided to use the Boughs & Blossoms stamp set and coordinating Bough Punch from the Stampin’ Up!® January - June Mini Catalog. Such a fun bundle to create beautiful cards for so many occasions!  

*I’ve listed all of the measurements and details for my card below and there is a full supply list at the very end of this post.
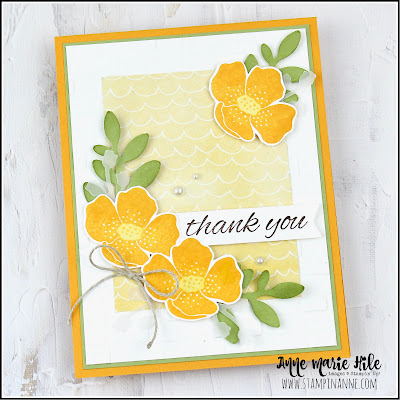
I started by stamping a trio of flowers in Mango Melody ink and colored in the centers with the Daffodil Delight Light Stampin’ Blends. These flowers are pretty easy to fussy-cut and after I cut them out I accented them with some Wink of Stella for sparkly detail. The punch is great because it has two sizes of leaf accents. For the larger leaves, I used a Sponge Dauber to add  some Pear Pizzazz ink for shading and of course, more Wink of Stella. The sparkle is tough to see in the photos but it really adds a nice detail! 

In my hunt for Daffodil Delight patterned paper, I came upon this fun print from the Hand Penned Designer Series Paper. I just love the simple, subtle pattern. I also used the Brick & Mortar 3D Embossing Folder to the Basic White layer for a pop of texture. I went back and forth a few times about adding that third flower in the top right corner. I have a “crafty quirk” about adding pieces in odd numbers. (Three flowers, seven leaves, three pearls…) But if you didn’t want to fussy-cut an extra flower, just using two also works! I love how this card came out and I hope you do as well. :) 
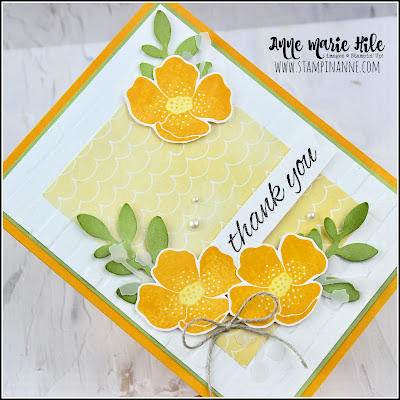
Card Measurements & Details: 
  • Mango Melody Card Base: 4-1/4” x 11”, scored at 5-1/2”
  • Pear Pizzazz Cardstock: 4” x 5-1/4” 
  • Basic White Cardstock: 3-7/8” x 5-1/8”, emboss with Brick & Mortar 3D Embossing Folder
  • Hand Penned Designer Series Paper: 2-7/8” x 3-3/4” 
  • Pear Pizzazz Cardstock: scraps to punch three of the larger leaf images using the Boughs Punch (add some Pear Pizzazz ink with a Sponge Dauber for some shading, then accent with Wink of Stella)  
  • Vellum Cardstock: scraps to punch four of the smaller leafy branch images from the Boughs Dies
  • Basic White Cardstock: scraps to stamp thee floral images in Mango Melody ink, color centers with Light Daffodil Delight Stampin’ Blends and fussy-cut
  • Basic White Cardstock: 2-3/8” x 1/2”, stamp sentiment in Early Espresso ink and punch the right side with the Banners Pick A Punch
  • Pearl Basic Jewels and Linen Thread
  • Basic White Cardstock (inside card): 4” x 5-14” , stamp image once in Pear Pizzazz ink (full strength) and again without reinking the image
  • Hand Penned Designer Series Paper (inside card): 1/2” x 5-1/4” 
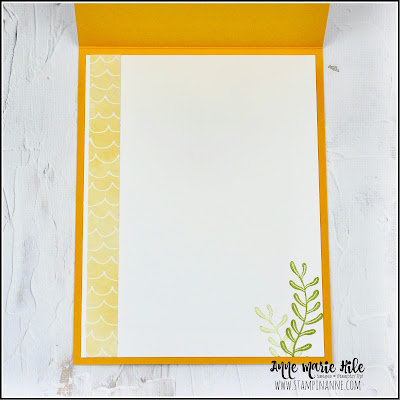
Finally, here is look inside the card. I simply added another strip of DSP and then stamped a coordinating image, once full strength in Pear Pizzazz ink and once stamped-off once. I left the rest of the inside of the card blank to add a handwritten thank you note. 

I hope you will join us this week over at The Paper Players and share your project for our fab        Color ChallengeWe’d love to see what you come up with! You can link up your project through Noon PST on Friday March 18th, 2022

Be sure to stop by and say hello to The Paper Players Design Team: 
 
Anne Marie Hile (that’s me!) 

Thanks for visiting today! All of the products that I used on this card are listed below. You c
an click on any of the photos to go directly to my 
Stampin’ Up!® online store. 

The current Host Code is: ETSD432J

Also, If you place an order over $50 (before tax and shipping) using the above host code, you will also receive a gift from me: a FREE Exclusive Project Tutorial PDFsee the sneak peek below. Each month, I partner with an amazingly talented group of demonstrators from around the world to create these project tutorials. This month's tutorial features 13 awesome project ideas to inspire your creativity! 
If your order is over $150, please do NOT use the host code. 
You will still receive the PDF tutorial along with an additional free gift from me.

Thanks for stopping by.
Have a HAPPY day!

Big hugs, 
Anne Marie

Product List

Thursday, July 18, 2019

Stampin Friends July Blog Hop

Welcome to the Stampin' Friends Blog Hop! I am super-excited to join this AMAZING group for the first time this month. We share on the third Thursday of every month with fun projects from all around the world! 
This month, our theme is Anything Goes, so I decided to create with the Magnolia Lane Product Suite. Not sure if everyone is aware of this, but Stampin’ Up!® has created a “mini-catalog” for the beginner stamper featuring a few stamp sets exclusive to that publication. (Click HERE to check it out!) One of those stamp sets is Magnolia Blooms. It coordinates with the Magnolia Lane Suite in the Annual Catalog, but is kind of a slimmed-down version  of the stamp set offered in the suite. The stamps in the suite offer coordinating dies, but this stamp set does not. No dies? No worries! Grab a pair of Paper Snips and this set really comes to life! 
This stamp set was designed for the BEGINNER stamper, but that doesn’t mean that it can’t be stepped-up for the AVID crafter, too. With Stampin’ Blends, Wink of Stella and embossing, you can achieve a lot of detail with this stamp set. Or you can keep it simple. It’s totally up to you! 


Today’s Colors: 


 Card Measurements: 
  • Basic Black Card Base - 4-1/4” x 11”, scored at 5-1/2
  • Petal Pink Cardstock - 4” x 5-1/4” 
  • Mossy Meadow Cardstock - 3-7/8” x 5-1/8” 
  • Magnolia Lane Designer Series Paper  - 3-3/4” - 5” 
I dressed up the coordinating box with more of the striped Magnolia Lane DSP and then fussy cut a little flower from the DSP. The shading in the paper is gorgeous, so this little bloom stood out, popped up on Stampin’ Dimensionals. I tied a double-bow using the Mossy Meadow Twine in the Magnolia Lane Ribbon Combo Pack. I added more pearls to coordinate with the card. I didn’t go over-the-top with embellishing the box because sometimes less is more. 
So, what’s in the box? Well, it holds a Crabtree & Evelyn hand cream. I was gifted one of these a few months back and let me tell you, I’m hooked on them. It’s NOT magnolia, I get it…but it’s floral, so it counts, right? This box would also fit a Bath & Body Works Hand Cream, you’d just have to adjust the measurements slightly for a little more height. If hand cream isn’t your thing, you could also fill the box with chocolates as an alternative. Everyone loves a sweet treat! 

Box Measurements: 
  • Basic Black Cardstock - 6-3/4” x 7” 
  • On 6-3/4” side, score at 1-1/4”, 3”, 4-1/4” and 6” 
  • On 7” side, score at 1”, 5-1/4” and 6-1/2” 
  • Petal Pink Cardstock - 1-5/8” x 4-1/8” 
  • Magnolia Lane DSP - 1-1/2” x 4” 
 Once you have the box scored, trim as shown in the photo above.
Then, trim off the tabs, as shown in the photo above. Don’t stress about them being even, they are going inside the box. Next, fold the box together and adhere using Liquid Glue (or Tear ’n Tape) for a secure hold. 
Because I just can’t stop with ONE fussy-cut image, here is another step you can take to step-it-up a little more. I stamped the magnolia images one more time, colored and cut the centers of the images and popped them up on the other fussy-cut flowers. Full disclosure, I am NOT a fussy-cutter. I just happened to have a Venti Starbucks in-hand when I created this card, so I felt like a fussy-cutting superhero and decided that another layer was necessary. Why not, right?  
Here is a look at the embossed sentiment and the Wink of Stella detail in the center of the flowers. This card has a lot of elegant detail, but this stamp set is also VERY elegant on its own. I love that it is aimed at beginners but avid stampers, like myself, can also step it up. There is no right or wrong way to stamp! Just do your thing! Create! 
Here is a little peek at the inside of the card, left blank for a handwritten sentiment. The Petal Pink layer is 4” x 5-1/4”. The Whisper White layer is 3-7/8” x 5-1/8” and the DSP is 1-1/2” x 5-1/8”. 

Keep on hopping along to see all of the beautiful projects this month. From here, you will head to Melissa Thomas’ blog. I met Melissa in-person at On Stage San Antonio back in April where we both shared presentations at the event. 

  1. Sue Vine
  2. Ellen Woodbridge
  3. Anastasia Radloff
  4. Katja Ettig
  5. Barbara Welch
  6. Maureen Rauchfuss
  7. Cheryl Taylor
  8. Steph Jandrow
  9. Anne Marie Hile (you are here!)
  10. Melissa Thomas
Thanks so much for stopping by today! All of the products I used on this card are listed below. You can click on any of the photos to go directly to my Stampin’ Up!® online store

This month’s Host Code is: KGJCCPJR. If you place an order over $50 (before tax and shipping) using this host code between now and June 30th, you will receive a gift from me: a free exclusive project tutorial bundle with 12 awesome projects. (see the sneak peek below) You will ALSO get a $5 coupon from Stampin’ Up!® to use on your order in August. 

If your order is over $150 (before tax and shipping), do NOT use the host code. You will earn host rewards from Stampin’ Up! AND you'll also receive the gift from me. Thanks so much for stopping by! 

Have a HAPPY day today! 
-Anne Marie


Product List